TV

Black Friday Deal: $100 off TV Installations + FREE Bracket

Aaaand here we go again.

Black Friday is back. It’s one of the biggest annual shopping frenzies and we’re not about to let our fans down.

Hold your finger steady… have we got a deal for you.

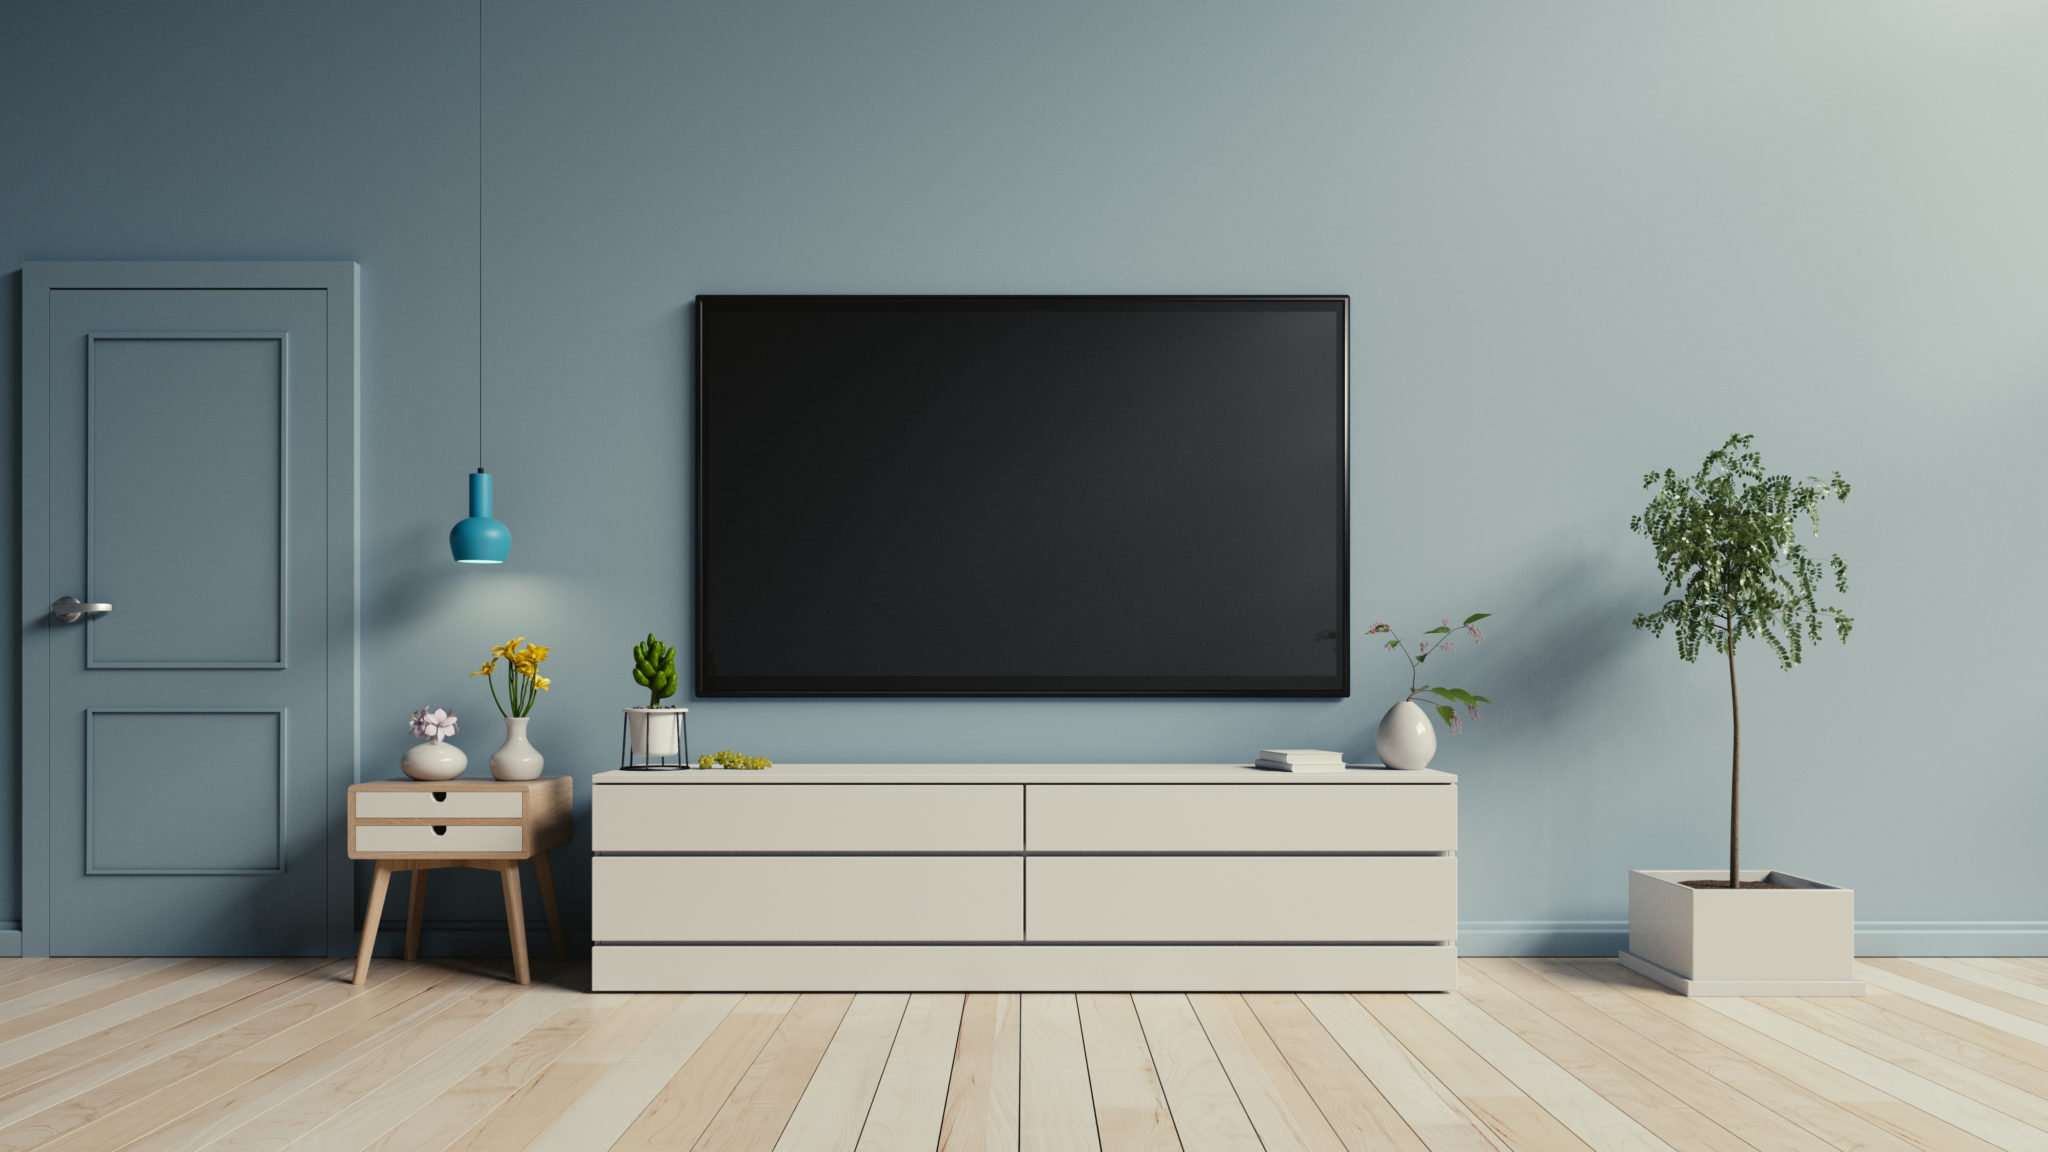
Have you been staring at that wall thinking how good a TV would look there? Then Black Friday is your lucky day.

Get $100 OFF when you book a TV installation with us + a FREE bracket (offer applies for both Standard and Premium TV wall mounting packages).

That’s right, get your TV mounted on the wall from only $199.

Don’t miss out. Our Black Friday Melbourne deal ends 23/11/2018 23:59 AEST Time.

Call us on 1300 556 212 or click here to redeem your Black Friday offer now!

What is HDR on TVs?

Here we go again, there’s a new buzzword in town – HDR, or High Dynamic Range.

It’s the hottest trend in the TV world at the moment and no one can stop talking about it.

But we’ve been let down by shiny acronyms in the past. So is HDR just marketing fluff or is it the real deal?

Put it this way, HDR is going to change the way you watch TV forever. Yes, we’re that excited about it.

Here’s what you need to know about HDR technology.

HDR is Your Window to the World

Let’s begin with an important distinction. HDR is not an alternative to 4k. It is a complementary tech that allows you to watch HDR content.

4k has been all the rage because it gives you more pixels – four times the number of pixels of a HD TV in fact. But what HDR promises is better pixels.

Our eyes can perceive brighter whites and darker blacks than TVs are capable of displaying. HDR technology bridges this gap, making TVs look more like real life than ever before.

HDR adds more detail to the overall picture quality. Whites are brighter, blacks are truer and colours are more vivid.

In short, 4k describes the quantity of pixels. HDR describes the quality of pixels.

It really is an experience to see the ‘pop’ and ‘depth’ of a HDR TV for the first time. Without a doubt, the TV is now well and truly the window to the world.  

HDR10, HDR10+ and Dolby Vision

New tech comes with a new format war and HDR is no different. There are currently three competing formats.

All three use metadata to allow the source video to tell a TV how to display the right picture. The difference is in how they communicate with the TV.

HDR10 is currently the most common format. Brightness levels are pre-set at the start of a source video and can’t be tweaked after.

HDR10+ is a format developed by Samsung and Panasonic that allows for brightness levels to be tweaked in real-time. This means you’ll be getting the most accurate picture for every scene. Other brands like Amazon and Phillips have also joined the HDR10+ movement.

Dolby has created its own format called Dolby Vision. While it also allows for brightness levels to be tweaked dynamically frame by frame, it makes further advancements on HDR10+.

Unlike the 10-bit colour depth that HDR10 and HDR10+ supports, Dolby Vision can deliver 12-bit colour depth for better colour accuracy and vibrancy.

How Can You Enjoy HDR

Most midrange and high-end TVs come equipped with HDR technology. A quick and easy way to check for HDR is to look for the ‘Ultra HD Premium’ logo.

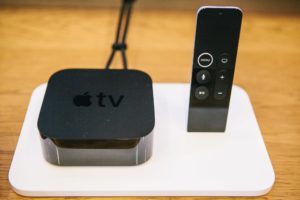
Once you’ve got yourself a HDR TV, you can enjoy HDR content on streaming services like Netflix and Apple TV. Both are continuously adding HDR content to their libraries.

You can also watch HDR content on Ultra HD Blu-ray discs. For this, you’ll need an Ultra HD Blu-ray player.

If you’re craving some HDR in your life right now (we don’t blame you), click here to browse our range of HDR TV’s that we can deliver and install right away!

OLED VS QLED – Which is better in 2019

The stars have truly aligned.

The golden age of television has coincided with the golden age of television technology. Weekend binges of dragons, slick lawyers and drug deals gone bad have never looked better. Then there’s all the other home entertainment offerings – 4k sports broadcasts, blu-rays and gaming.

What a time to be in the market for a new TV…

Only, now there’s a web of acronyms and jargons to untangle.

The two best screen technologies are OLED and QLED. They look and sound similar but couldn’t actually be more different.

To help you make the right decision, here’s a simple-to-understand comparison of the two.

So What is OLED TV?

OLED (organic light-emitting diode) is a piece of display tech where every pixel on the screen can emit its own light when charged with electricity.

Each pixel can be independently turned on or off.

The major manufacturer of OLED is LG with other brands like SONY and Panasonic on board.

What about QLED TV?

QLED (Quantum-dot light-emitting diode) uses a layer of quantum dots to produce a wide range of colours when hit by light from behind.

This means that unlike OLED, QLED TV’s require a backlight.

Quantum dots are capable of delivering a much richer gamut of colours than OLED but these capabilities can’t be maximised until quantum dots can emit their own light without the need for any backlighting.

QLED is manufactured by Samsung with Hisense and TCL also on board.

Which One Should You Choose?

That will depend on your individual needs. There is no definitive answer and both have their pros and cons.

To help you with your decision, let’s compare the two based on type of media and key performance factors.

OLED or QLED for Movies

If you’re looking for the best cinematic viewing experience at home, then it’s all about the black levels. QLED’s backlighting system means that blacks will suffer from ‘light bleed’ and appear more grey.

OLED’s self-emitting pixels means that you’ll be able to enjoy unprecedented levels of inky blacks.

OLED or QLED for Gaming

For gaming, you’ll want to consider other factors ahead of image quality.

First and foremost – input lag. This is the delay between the output from your console and seeing it on the screen. When you’re dealing with games where fractions of a second make all the difference, you’ll want a screen with the lowest input lag. While input lag varies from model to model, QLED screens generally have the lowest input lag.

Another factor is burn-in. OLED can suffer from image retention of elements that are on the screen for too long like logos and scoreboards. QLED has zero risk of burn-in.

QLED also delivers higher brightness due to its backlight system. In light-filled rooms, QLED is the obvious choice.

OLED or QLED for Sports

Unless you’ve been falconed or caught with a left hook, you shouldn’t be experiencing any motion blur in sports.

The deciding factor here is your TV refresh rate. This refers to the number of times a second that your screen refreshes itself. The more times the screen is refreshed, the smoother the picture.

OLED pips QLED in this category with faster refresh rates.

Viewing Angles

QLED screens are best viewed dead centre. Move side to side or up and down and you’ll begin to notice a loss in colour and contrast.

OLED, on the other hand, allows for a much wider viewing angle without compromising picture quality.

Power Consumption

Since OLED panels require no backlight, they’re thinner and lighter, requiring less power than QLED screens.

So is OLED the Best Then?

OLED takes a slight lead in terms of black levels, viewing angles, refresh rates and power consumption. QLED on the other hand is brighter, can produce more vivid colours, doesn’t suffer from image burn and perhaps most compellingly, is the cheaper of the two screens.

At this stage, OLED may have a slight edge over QLED, but the margins are very slim.

At the end of the day, it will come down to your viewing behaviour and budget.

What About My Beloved Plasma?!

We get it. Back in the day, you bought the best TV on the block which happened to be a plasma. It had the deepest blacks and the richest colours. In your eyes, it still looks really, really good.

So here’s a bonus round: Plasma vs OLED.

Looks like it’s going to be a pretty short round. Everything from black levels, colours and overall picture quality is simply on another level with OLED.

Your Panasonic or Pioneer Kuro may have outlasted every contender over the years, but it’s time to bid a fond farewell to it, at least as the main TV.

Click here to browse our range of OLED and QLED TV’s.

Got more questions? Call us today on 1300 556 212 to speak with one of our television experts.

How to Mount a TV on Your Wall

After spending hours researching and staring at all the panels in the store, you’ve finally picked out ‘the one’. But right now it’s sitting on the floor looking pretty sad. A thing of beauty like this deserves to be on the wall.

A TV wall mount offers many benefits over a standard TV stand. It frees up valuable space, prevents nasty little fingerprints, and adds a touch of class to your home.

So let’s get started…

What You’ll Need

  • Mounting bracket
  • Drill
  • Nails
  • Stud finder
  • Level
  • Measuring tape
  • Electrical tape
  • Brush wall plates or cable duct
  • Pencil
  • A cold beer for a job well done

Step 1: Check That Your TV is Wall Mountable

It might seem obvious, but it’s always good to check that your TV can actually be wall mounted (most brands these days like Samsung or Sony are all designed to be wall mountable).

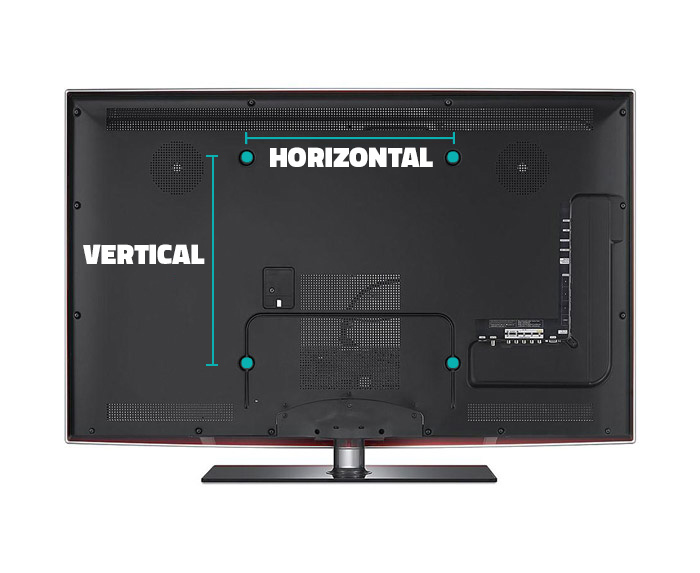
If you see ‘VESA Compatible’ on the specifications or 4 threaded holes on the back of your TV, then you’re ready to go!
Step 2: Choose The Right Bracket

When deciding on TV brackets, several factors need to be considered. The size and model of your TV may dictate a certain bracket type. There’s also the layout of your viewing space and seating arrangements.

There are 3 common types of brackets: standard flat TV mount, tilting TV mount and the articulating TV mount.

The standard flat TV mount is designed to fix your screen flat against the wall. This bracket provides the lowest profile and is ideal if you don’t require any adjustments.

The tilting TV mount allows you to tilt the screen up or down.
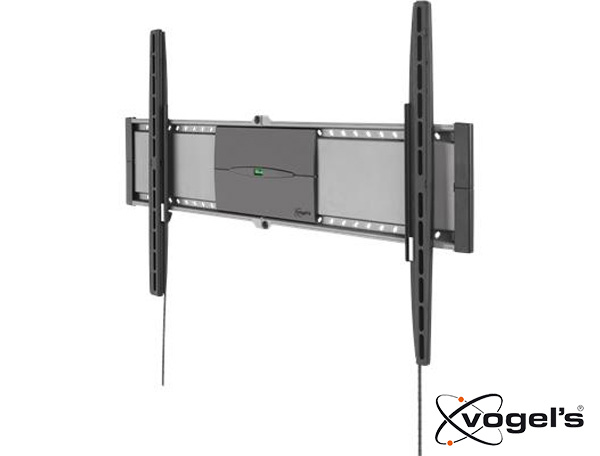
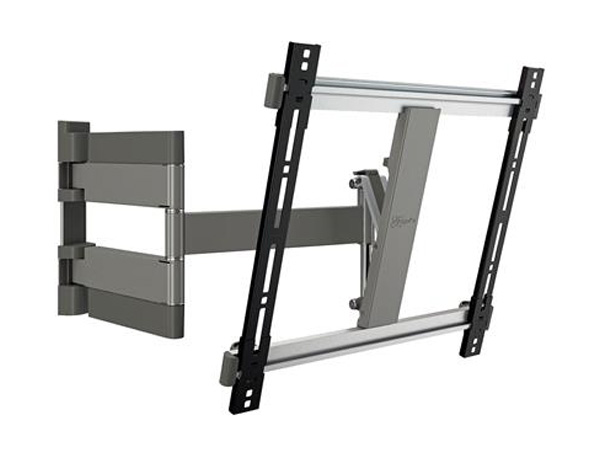
If you’re looking for full freedom of movement, then you’ll need the articulating TV mount (also called full motion TV mount). It comes with a retractable arm that allows you to pull the TV away from the wall to tilt up or down or swivel left or right till your eyes are content!

Step 3: Determine the Position of Your TV

“At what height should I install my TV?” This is the most common question we get asked at Wired Store. This will depend on several factors like the size of the TV and the room but here are some guidelines for the best viewing experience.

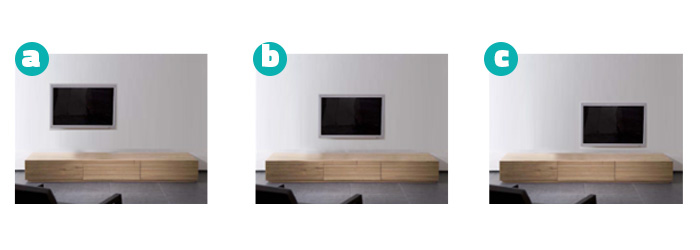
The most common mistake we see is mounting the TV too high. So what’s the sweet spot? Since most action takes place in the middle of the screen, this is the area that should be at eye level when you’re seated. Not only will this ensure the best picture, you’ll also avoid an appointment with the chiropractor.

But sometimes the sweet spot isn’t always possible. You may be limited by the shape of the room or your furniture. Sometimes, a higher placement may actually be appropriate. For instance, you might want to lie in bed and watch TV at the same time. In all these cases, we recommend using a tilting wall mount or articulating wall mount so that the TV can be appropriately angled.

Now that height is out of the way, should your TV be centre of the wall or off to the side? This will depend on the position of your couch. We generally recommend that you’re viewing the TV head on without needing to tilt your head.
Step 4: Prepare the Wall

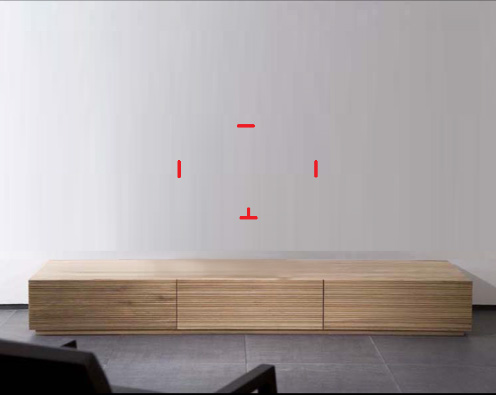
When you’ve found the sweet spot, it’s time to mark out exactly where the TV will go on the wall. Some people prefer pencil but we recommend electrical tape.

Mark all the edges of the TV on the wall. To ensure everything is even, use a level when positioning the tape.
Step 5: Find those Studs

It’s now time to find a strong and reliable place to hang your TV bracket.

Enter the stud finder. Take your time with these suckers and always double check your readings. Run the stud finder from side to side several times and mark each stud with tape. We recommend locating three studs and confirming that they’re the same distance apart.
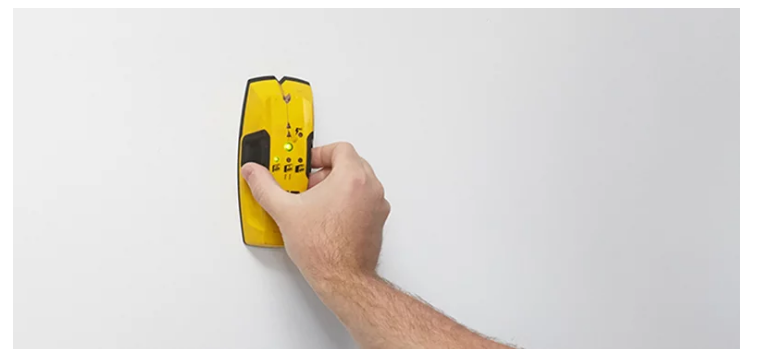
A seam in the drywall can often be mistaken for a stud. Once you’ve determined where to drill your holes, poke a small nail into the wall to confirm that it is a stud. You’ll also want to drill in the centre of the stud as this provides the best support. Poking nails to the left and right of your drilling hole will help you establish the centre.

“But I can’t find any studs?!”. Don’t despair, you can always use drywall toggles. Always double check that the toggles can support the combined weight of the bracket and TV.

Step 6: Fixing the Mount to the Wall

You’re almost there, not long before your TV goes up! But first, let’s get the TV mount up.

You’ll need to drill pilot holes to prevent the studs from splitting when the screws are driven in. Then position the mount on the wall and drive in the screws.

Step 7: Hide your TV wires

Hanging a TV on the wall looks great. But not when there’s an eyesore of messy wires. You’re probably thinking… “I need a wire hider, like right now”.

While they’re technically not called ‘wire hiders’, there are several solutions that can do exactly that – hide TV wires.

If you’re mounting a TV on a solid wall (brick or concrete), the easiest and quickest solution is cable ducting. This involves an exterior cable cover that can elegantly conceal several cables.

If you’re mounting a TV on a hollow wall, you can go a step further and literally run your cables behind the wall. You’ll need two brush wall plates, one on top behind the TV and one below, usually behind your entertainment unit. For the top plate, you can avoid running into a noggin by cutting a hole in the drywall behind the bottom of your TV. The cables will run from the top and come out below to connect to your other devices.

This is something you really only want to do once, so be liberal with the cables that you’re running. You never know what devices you’ll be adding in the future so ensure you’re running a cable set with enough HDMI cables, an optical cable for a sound system as well as network and USB cables.

Final Step: Mount Your TV to the Wall

The moment has arrived. It’s time to mount your TV and weep with joy. Steady hands now!

Attach the brackets to your TV using the four threaded holes at the back and hook it onto the wall mount according to the directions included with your wall mount.

For additional peace of mind, remember to install safety screws to safeguard your TV from falling if it’s ever pulled or bumped.

There’s No Way I Can Do This…

We get it, handling expensive TV’s and drilling holes in the wall can be intimidating.

That’s what we’re here for. Our experts perform TV wall mount heroics day in day out.

Call us today on 1300 556 212 to put your TV up where it belongs!

5 Reasons to work with local businesses rather than Franchises

Franchises have been in the spotlight for the past few month with so many franchisees suffering from financial and mental breakdowns after seeing their dream to own a business turn into a nightmare.  Free work, underpayment, restraint on what they can do are just a few of the unfair arrangement franchisers forces franchisees to sign. According to The Gardian, “parliamentary inquiry into franchising code of conduct has not receive a single submission from a franchisee” because they fear it would breach their contract. Here are 5 reasons why you should work with a local business rather than a franchise.

1. Help your local economy

Making the choice of local business for the services you need is beneficial not only to the economy of your city but also to employment, because companies require local labor to produce.

2. Cut the middle men and Save Money

No need to pay for the corporate expenses and TV commercials franchises are running, find a local installer and just pay for the service.

3. Better flexibility

A local business owner only works for a small number of clients for whom he invests 100% of his time and do as a please because he doesn’t need to answer to a set of rules decided by a Franchiser.


4. Better Quality and service

Locals suppliers take pride in the service they provide for their community and will get the best possible products for your bucks. Meanwhile, franchisee won’t even be able to decide the antennas and TV brackets they want to use.

5. Better reliability

If you have a look at franchises reviews it’s really mixed. The service is sometimes referred as excellent and sometimes as dodgy. That’s because they have both good and bad franchisees. At Wired Store we hire and form all our technicians yourself and that’s why you will only get the best technicians for the jobs you need.


Is it Safe to Install a TV above a Fireplace?

First thing to consider when installing a TV above a fireplace is whether you’ll be watching the TV while burning a fire?

We recommend that you check surface temperature and TV specs before having your TV installed as too much heat adversely affects a TV’s lifespan and may void product warranties. A quick and easy experiment is to tape a thermometer onto the wall where you want the TV to go and record the temperature when the fire is blazing. If the temperature is higher than recommended, consider other locations to install your TV or continue with the installation but avoid watching TV and having the fireplace running simultaneously.

TVs installed above fireplaces are generally higher than the recommended 1.5 m sitting eye level which is why we also recommend that you sit and check to see if you experience neck strain. To help avoid neck strain and to help improve viewing angles we use tilt brackets for no additional cost. However if you are still concerned about neck strain you may want us to provide and/or install a more sophisticated, and slightly more expensive bracket, with an articulating pull- down arm. This bracket will allow you to lower the TV when you watch it, then stow it back over the fireplace.

Choosing The Right Spot for a TV Wall Installation

When going for a TV wall installation it’s important to choose a spot where it will look good as well as somewhere practical. No matter what size or type of TV you bought, take time and consider the placement for a moment.

Room lightning and reflections are the first killers of TV images so you want to avoid choosing a wall directly opposite a window to avoid morning glare.

If you have toddlers, a TV wall installation is a good way to make your home safe and secure from cables.

You might also want to choose a height safe from little fingers but not higher than eye level. A TV at the perfect height will look very low when you are standing. This is normal because we usually don’t watch TV while standing.

You also want to consider the distance. Most people sit about 3 meters away from their TVs, which is too far to differentiate 1080p and 720p on most TV sizes. Sitting closer will help you fill more of your field of view making the experience more immersive. It will also help you see more details from the image and getting the most of your TV resolution. If you really can’t or don’t want to sit too close you can also get a bigger TV instead.

If you are still not sure where to install your TV you can call one of our expert to help you.

Your Content Goes Here

Go to Top